How to Test a Circuit Breaker with a Multimeter?
In this comprehensive guide, you will learn how to test a circuit breaker using a multimeter. We'll cover step-by-step instructions, safety precautions, and tips to ensure accurate results, helping you diagnose potential issues with your circuit breakers and maintain a safe electrical system in your home.
Table of Contents
- Introduction to Circuit Breakers and Multimeters
- Safety Precautions
- Step-by-Step Guide: Testing a Circuit Breaker with a Multimeter
- Common Issues and What They Mean
- Additional Tips for Accurate Testing
- Conclusion
Introduction to Circuit Breakers and Multimeters
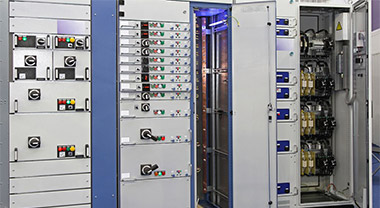
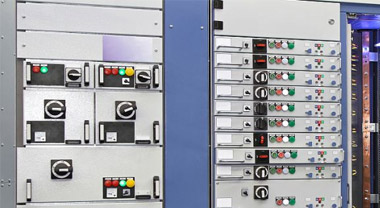
Circuit breakers are essential components in an electrical system, designed to protect your home from electrical overloads and short circuits. When a fault is detected, the circuit breaker automatically shuts off the flow of electricity to prevent damage or electrical fires.
A multimeter is a versatile tool used to measure various electrical properties, such as voltage, current, and resistance. Multimeters come in digital and analog versions, but digital multimeters (DMMs) are more common and easier to use for most homeowners. By using a multimeter, you can test the functionality of a circuit breaker to ensure it's operating correctly and providing adequate protection for your electrical system.
Safety Precautions
Working with electricity can be dangerous, so it's crucial to follow safety precautions when testing a circuit breaker with a multimeter.
- Turn off the main breaker: Before testing a circuit breaker, turn off the main breaker to cut power to the entire electrical panel.
- Use a multimeter with appropriate ratings: Ensure your multimeter is rated for the voltage levels you will be working with and can handle the specific task of testing circuit breakers.
- Wear protective gear: Use insulated gloves and safety glasses to protect yourself from potential electrical hazards.
- Use caution: Be aware of your surroundings, and avoid touching live wires or other energized components while testing the circuit breaker.
Step-by-Step Guide: Testing a Circuit Breaker with a Multimeter
Follow these steps to test a circuit breaker using a multimeter:
1. Set up the multimeter
First, ensure your multimeter is set to measure AC voltage. This is typically indicated by a "V" with a wavy line (~) next to it. If your multimeter has multiple voltage ranges, select the appropriate range for your circuit breaker's voltage rating (e.g., 120V or 240V).
2. Turn off the main breaker
As a safety precaution, turn off the main breaker to cut power to the entire electrical panel. This will help prevent accidental contact with live wires and reduce the risk of electric shock.
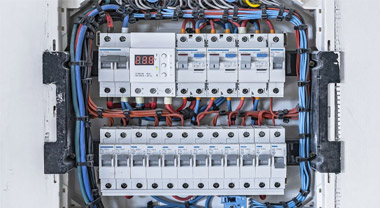
3. Remove the panel cover
Carefully remove the panel cover to expose the circuit breakers. Be cautious not to touch any live wires or energized components inside the panel.
4. Identify the circuit breaker to test
Locate the circuit breaker you wish to test. It's helpful to label your circuit breakers beforehand or consult a circuit map to identify the specific breaker you need to test.
5. Test for voltage
To test the circuit breaker, place one probe of the multimeter on the screw terminal of the breaker, where the load wire (usually black or red) connects. Place the other probe on the neutral bus bar, where the white neutral wires are connected. The multimeter should display a voltage reading close to zero if the breaker is off and a reading close to the breaker's voltage rating (e.g., 120V or 240V) if the breaker is on. If the voltage reading is significantly different from the expected value, the breaker may be faulty.
6. Test for continuity
Turn off the circuit breaker you're testing, and set your multimeter to measure resistance or continuity (indicated by the ohm symbol, Ω). Place one probe on the screw terminal of the breaker and the other probe on the breaker's output terminal. A functional circuit breaker should display infinite resistance (or no continuity) when off, and near-zero resistance (or continuity) when switched on. If the readings are not as expected, the breaker may be malfunctioning.
7. Replace the panel cover and restore power
After testing the circuit breaker, carefully replace the panel cover, ensuring all wires are in their proper locations. Then, turn the main breaker back on to restore power to the electrical panel.
Common Issues and What They Mean
Here are some common issues you may encounter when testing a circuit breaker with a multimeter and what they could indicate:
- Incorrect voltage reading: If the voltage reading is significantly different from the expected value, the breaker may be faulty or there may be an issue with the wiring or connections in the electrical panel.
- No continuity when the breaker is on: If there is no continuity when the breaker is switched on, the breaker could be defective and may need to be replaced.
- Continuity when the breaker is off: If there is continuity when the breaker is switched off, it could indicate a short circuit within the breaker itself, requiring replacement.
Additional Tips for Accurate Testing
To ensure accurate and reliable results when testing a circuit breaker with a multimeter, consider the following tips:
- Check your multimeter's settings: Ensure your multimeter is set to the correct mode and range for measuring voltage and resistance. Incorrect settings can lead to inaccurate readings.
- Ensure proper probe placement: Make sure the multimeter probes are securely connected to the appropriate terminals on the circuit breaker and neutral bus bar for accurate readings.
- Inspect for damage: Visually inspect the circuit breaker and wiring for signs of damage, corrosion, or loose connections, which could affect the test results.
- Test multiple breakers: If you're unsure whether a specific breaker is functioning correctly, test other breakers in the panel for comparison. This can help you determine if there's a broader issue with your electrical system.
Conclusion
Testing a circuit breaker with a multimeter is a straightforward process that can help you diagnose potential issues with your home's electrical system. By following the step-by-step guide provided in this article, you can accurately assess the functionality of your circuit breakers while prioritizing safety precautions. Remember to consult a licensed electrician if you're uncertain about any aspect of the testing process or if you discover a malfunctioning circuit breaker that requires further attention.
Related
Address:No 658,Jinzhong Road,Changning District Shanghai China
Tel:+86-021-33555507 Email:[email protected] |