Replacing Circuit Breaker Step by Step
1. Introduction
Circuit breakers play a critical role in ensuring the safety of a home's electrical system. These devices are designed to automatically interrupt the flow of electrical current when they detect a fault or an overload, preventing potential fires or damage to electrical equipment. Over time, circuit breakers may wear out or malfunction, necessitating replacement to maintain the proper functioning of the home's electrical system. This comprehensive guide will provide a step-by-step process for replacing a circuit breaker, emphasizing the importance of safety and professionalism when working with electricity.
2. Safety Precautions
Before beginning any work on your home's electrical system, it is crucial to follow proper safety precautions to minimize the risk of electric shock or injury.
2.1. Disconnecting power
Before you attempt to replace a circuit breaker, it is essential to disconnect power to the entire electrical system. To do this, follow these steps:
2.1.1. Turning off the main breaker
Locate the main breaker switch in your electrical panel, which is typically a larger switch than the others, and flip it to the "off" position. This will shut off power to all the circuits in your home, ensuring a safe working environment.
2.1.2. Using a voltage tester
After turning off the main breaker, use a non-contact voltage tester to check for the presence of electricity in the panel. This will confirm that you have successfully disconnected power and that it is safe to proceed with replacing the circuit breaker.
2.2. Appropriate tools and protective gear
Using the proper tools and protective gear when working with electricity is essential to ensure your safety. Here are some recommended items to use:
2.2.1. Insulated screwdrivers and pliers
Using insulated tools, such as screwdrivers and pliers with rubber or plastic-coated handles, helps prevent accidental contact with live electrical components, minimizing the risk of electric shock.
2.2.2. Non-conductive gloves and eye protection
Wearing non-conductive gloves made from materials like rubber or leather can help protect your hands from accidental contact with live electrical components. Additionally, wearing safety glasses or goggles can help protect your eyes from debris, sparks, or other hazards while working with the electrical panel.
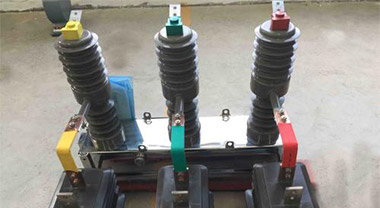
3. Identifying the Circuit Breaker to be Replaced
Before you can replace a circuit breaker, you need to identify which one is faulty and requires replacement. Here's how to do it:
3.1. Locating the breaker panel
Find the electrical panel in your home, which is usually located in a utility room, basement, or garage. The panel contains the main breaker switch, as well as individual circuit breakers that control power to various areas of your home.
3.2. Identifying the faulty breaker
Once you have located the electrical panel, you can begin to identify the faulty circuit breaker. Here are some methods to help you do this:
3.2.1. Tripped or malfunctioning breakers
Look for any breakers that have tripped, which typically appear in the "off" or middle position rather than the "on" position. You may also notice that certain electrical outlets or appliances in your home are not functioning, which could indicate that the corresponding circuit breaker is malfunctioning and needs to be replaced.
3.2.2. Labeling and mapping circuits
Most electrical panels have labels indicating which circuit breakers correspond to specific areas or appliances within your home. Review these labels to help identify the breaker that needs replacement. If your panel is not labeled, consider creating a circuit map by systematically turning off breakers one at a time and noting which appliances or rooms lose power. This will help you locate the correct breaker for future reference and maintenance.
3.3. Verifying breaker type and specifications
Before purchasing a replacement circuit breaker, it is essential to verify its type and specifications to ensure compatibility with your electrical panel. Follow these steps:
3.3.1. Matching amperage and voltage ratings
Check the amperage and voltage ratings on the faulty breaker, typically listed on its side or front. Make sure to purchase a replacement breaker with the same ratings to avoid potential electrical hazards or code violations.
3.3.2. Identifying compatible breaker brands and models
Some electrical panels are designed to work with specific brands or models of circuit breakers. Consult your panel's documentation or consult a professional electrician if you are unsure about compatibility to ensure you purchase the correct replacement breaker.
4. Removing the Old Circuit Breaker
Once you have identified the faulty circuit breaker and obtained a compatible replacement, you can proceed with removing the old breaker. Follow these steps:
4.1. Unscrewing the panel cover
Using an insulated screwdriver, carefully remove the screws securing the panel cover and set the cover aside. This will expose the internal components of the electrical panel, including the circuit breakers and wiring.
4.2. Detaching the wire from the old breaker
Before removing the old circuit breaker, you need to detach the wire connected to it. To do this, follow these steps:
4.2.1. Loosening the terminal screw
Using an insulated screwdriver, loosen the terminal screw that secures the wire to the old circuit breaker. Be cautious not to touch any other components inside the panel to avoid accidental electric shock.
4.2.2. Carefully pulling the wire out
Once the terminal screw is loosened, gently pull the wire out from the old breaker, taking care not to damage it. Set the wire aside in a safe location where it will not come into contact with any other components in the panel.
4.3. Unclipping the old breaker from the panel
With the wire removed, you can now unclip the old circuit breaker from the panel. Follow these steps:
4.3.1. Releasing the clips or tabs
Depending on the design of your electrical panel, the circuit breaker may be secured by clips or tabs. Carefully release these to loosen the breaker from the panel.
4.3.2. Gently rocking the breaker back and forth
After releasing the clips or tabs, gently rock the old breaker back and forth to disengage it from the panel. Once it is fully dislodged, remove it from the panel and set it aside for proper disposal or recycling.
5. Installing the New Circuit Breaker
With the old circuit breaker removed, you can now install the new one. Follow these steps:
5.1. Attaching the wire to the new breaker
Before securing the new circuit breaker in the panel, attach the wire that you previously removed from the old breaker. To do this, follow these steps:
5.1.1. Inserting the wire under the terminal screw
Position the wire so that it is properly seated under the terminal screw of the new breaker. Ensure that the wire makes solid contact with the terminal, and that there are no frayed or damaged strands that could compromise the connection.
5.1.2. Tightening the terminal screw securely
Using an insulated screwdriver, tighten the terminal screw to secure the wire in place. Be careful not to overtighten the screw, as this could damage the wire or the breaker itself.
5.2. Clipping the new breaker into the panel
With the wire attached, you can now secure the new circuit breaker in the electrical panel. Follow these steps:
5.2.1. Aligning the clips or tabs with the slots
Position the new breaker so that its clips or tabs align with the appropriate slots in the panel. Depending on the design of your panel, these may be on the side, top, or bottom of the breaker.
5.2.2. Pressing the breaker firmly into place
Apply firm, even pressure to the new breaker, pressing it securely into the panel until the clips or tabs fully engage. The breaker should sit flush with the surrounding breakers when properly installed.
6. Finalizing the Installation
With the new circuit breaker installed, you can now complete the installation process and restore power to your home. Follow these steps:
6.1. Reattaching the panel cover
Using an insulated screwdriver, reattach the panel cover by carefully replacing and tightening the screws that you removed earlier. Ensure that the cover is secure and properly seated to protect the internal components of the panel.
6.2. Turning on the main breaker
Flip the main breaker switch in the panel back to the "on" position, restoring power to your home's electrical system. Be cautious when handling the panel, as live current is now flowing through it.
6.3. Testing the new breaker
To confirm that the new circuit breaker is functioning correctly, follow these steps:
6.3.1. Switching on the new circuit breaker
Flip the newly installed breaker to the "on" position. You should hear a distinct "click" as the breaker engages.
6.3.2. Verifying power to the corresponding circuit
Check the appliances, outlets, or rooms that are connected to the replaced circuit breaker. Ensure that power has been restored and that everything is functioning as expected. If you encounter any issues, it may be necessary to re-check your work or consult a professional electrician for further assistance.
7. When to Call a Professional Electrician
While replacing a circuit breaker is a manageable task for many homeowners with basic electrical knowledge, there are situations when it is best to consult a professional electrician. Consider calling a professional if you encounter any of the following:
7.1. Signs of more extensive electrical problems
If you notice flickering lights, buzzing noises, or burning smells coming from your electrical panel or other areas of your home, these may indicate more extensive electrical problems that require the expertise of a professional electrician.
7.2. Dealing with outdated or damaged breaker panels
Older or damaged breaker panels may pose increased safety risks or may not meet current electrical codes. If you suspect that your panel requires an upgrade or significant repairs, it is best to consult a professional electrician who can assess the situation and recommend the appropriate course of action.
7.3. Adhering to local electrical codes and regulations
Local electrical codes and regulations exist to ensure the safety of electrical systems and installations. If you are unsure about the requirements in your area or are concerned about potential code violations, consulting a professional electrician can help ensure that your home's electrical system is safe and compliant.
8. Conclusion
In conclusion, replacing a circuit breaker is an essential maintenance task that can help ensure the proper functioning and safety of your home's electrical system. By following the step-by-step process outlined in this guide, you can confidently replace a circuit breaker while prioritizing safety and professionalism. However, if you encounter any issues or are uncertain about any aspect of the process, don't hesitate to consult a professional electrician to ensure the best outcome for your home and electrical system.
Related
About Us
|
Address:No 658,Jinzhong Road,Changning District Shanghai China
Tel:+86-021-33555507 Email:[email protected] |