how to install a circuit breaker?
In this comprehensive guide, we'll explain how to install a circuit breaker in your home's electrical panel. We'll cover the basics of what a circuit breaker is, why it's an essential component of your electrical system, what tools you'll need for the job, the safety precautions you must take, and the steps to install a breaker. This guide is ideal for handy homeowners who are comfortable with DIY tasks.
Table of Contents
- Understanding a Circuit Breaker
- Why Install a New Circuit Breaker?
- Tools for the Job
- Safety Precautions
- Steps to Install a Circuit Breaker
- When to Seek Professional Help?
- Summary
Understanding a Circuit Breaker
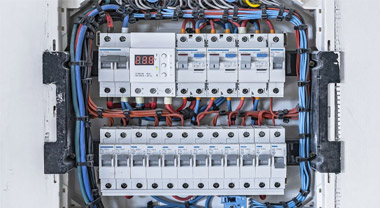
A circuit breaker is a crucial safety device in every home's electrical system. It automatically shuts off the flow of electricity when a circuit overload or short circuit occurs, thus preventing fires and other electrical accidents.
Why Install a New Circuit Breaker?
There are several reasons why you may need to install a new circuit breaker. These include expanding your home's electrical system, replacing a faulty breaker, or upgrading your panel to accommodate more electricity.
Tools for the Job
- Circuit breaker
- Screwdriver
- Wire stripper/cutter
- Voltage tester
- Flashlight (optional)
Safety Precautions
Before you start, remember that working with electricity is dangerous. Always turn off the main power before starting, wear rubber-soled shoes, use insulated tools, and keep your work area dry.
Steps to Install a Circuit Breaker
Step 1: Turn Off the Main Power
Before you start working, turn off the main power to your home to ensure your safety.
Step 2: Remove the Panel Cover
Use a screwdriver to remove the screws holding the electrical panel cover in place. Set the cover and screws aside.
Step 3: Install the New Breaker
Attach the circuit wire to the new breaker using the screw terminal. Then, snap the breaker into an open slot on the panel.
Step 4: Connect the Circuit Wire
Strip the insulation off the end of the circuit wire and connect it to the appropriate terminal on the breaker. Tighten the screw to secure it.
Step 5: Test the Installation
Turn the new breaker to the "on" position, then turn the main power back on. Check if the new breaker is working correctly. If it stays in the "on" position, your installation is successful.
Step 6: Replace the Panel Cover
Put the panel cover back in place and secure it with the screws you removed earlier.
When to Seek Professional Help?
If at any point you feel uncomfortable or unsure about the installation process, don't hesitate to call a licensed electrician. Also, if the new breaker trips immediately after installation, there may be a more serious problem that requires professional attention.
Summary
Installing a circuit breaker can be a simple DIY task if you follow the necessary safety precautions and steps. This guide walked you through the process, explaining the purpose of a circuit breaker, why you might need to install a new one, the tools required, and the steps to safely install a breaker. Remember, safety is paramount when dealing with electricity. When in doubt, always consult a professional.
Related
Address:No 658,Jinzhong Road,Changning District Shanghai China
Tel:+86-021-33555507 Email:[email protected] |