how to replace a circuit breaker in a panel?
In this comprehensive guide, we'll walk you through the steps to replace a circuit breaker in an electrical panel. By understanding the purpose of a circuit breaker, the signs of a faulty one, the safety precautions to follow, and the actual replacement process, you'll be able to perform this essential maintenance task at home. Whether you're a seasoned homeowner or a newbie, this guide is for you!
Table of Contents
- Understanding Circuit Breakers
- Identifying a Faulty Circuit Breaker
- Necessary Tools and Equipment
- Safety First: Precautions to Take
- Step-by-Step Guide to Replacing a Circuit Breaker
- When to Hire a Professional?
- Summary
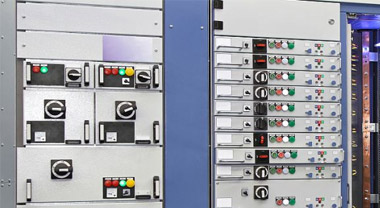
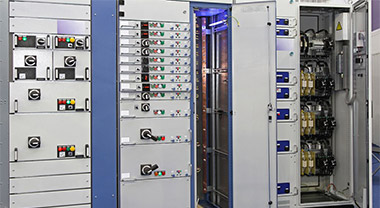
Understanding Circuit Breakers
Circuit breakers are vital safety devices in your electrical system. They prevent electrical overloads and short circuits by interrupting the flow of current when they detect excess electricity. Understanding how they work can be beneficial when you're looking to replace them.
Identifying a Faulty Circuit Breaker
Knowing when to replace a circuit breaker is crucial. Signs of a faulty breaker include regular tripping, a burning smell emanating from the breaker box, visible signs of damage, and age (breakers that are 15-20 years old may require replacement).
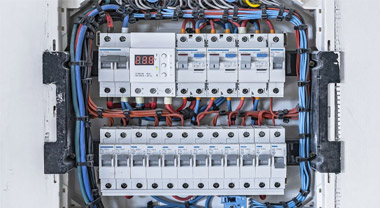
Necessary Tools and Equipment
- Screwdriver
- Wire stripper/cutter
- Voltage tester
- Insulated pliers
- New circuit breaker
- Flashlight (optional)
Safety First: Precautions to Take
Working with electricity requires careful attention to safety. Ensure to turn off the main power supply before starting, wear rubber-soled shoes, and keep your hands dry. Avoid touching the metal parts of the breaker directly.
Step-by-Step Guide to Replacing a Circuit Breaker
Step 1: Shut Off the Main Power Supply
Always turn off the main power supply to prevent the risk of electrical shock. The main breaker switch is typically found in your circuit box.
Step 2: Remove the Panel Cover
With a screwdriver, unscrew and remove the circuit panel cover to expose the breakers.
Step 3: Locate the Faulty Breaker
Look for the breaker that is in the "off" position or between the "on" and "off" positions. A burning smell or a charred appearance can also indicate a faulty breaker.
Step 4: Remove the Faulty Breaker
Loosen the terminal screw with a screwdriver and disconnect the circuit wire from the breaker. Then, carefully unclip the breaker from its slot.
Step 5: Install the New Breaker
Clip the new breaker into the same slot where the old one was. Ensure it is securely in place.
Step 6: Reconnect the Circuit Wire
If necessary, strip about half an inch of insulation off the circuit wire using a wire stripper/cutter. Reattach it to the new breaker by tightening the terminal screw.
Step 7: Test the New Breaker
Switch the new breaker to the "on" position. Turn on the main power supply and check if the new breaker stays in the "on" position. If it does, you've successfully replaced the breaker.
Step 8: Replace the Panel Cover
Finally, put the panel cover back in place and secure it with the screws you removed earlier.
When to Hire a Professional?
Though replacing a circuit breaker can be a straightforward task, it may not always be the case. If the breaker keeps tripping after replacement, or if you notice an unusual smell or see sparks, call a licensed electrician. Don't take chances if you're unsure or uncomfortable doing this task yourself.
Summary
Knowing how to replace a circuit breaker in a panel is a valuable skill that can save time and money. This guide offered a detailed walkthrough of the process, from understanding circuit breakers to identifying a faulty one, collecting the necessary tools, taking safety precautions, and following a step-by-step replacement guide. Remember, safety is paramount when dealing with electricity. If in doubt, always seek the help of a professional.
Related
Address:No 658,Jinzhong Road,Changning District Shanghai China
Tel:+86-021-33555507 Email:[email protected] |